
Answer
IMPORTANT DISCLAIMER:
We are providing the information in this article as a courtesy to our Abila customers. Assistance with 3rd party applications such as Microsoft SQL or Windows Task Scheduler falls outside of the scope of the Abila Maintenance and Support Agreement.
By publishing this article we do not assume responsibility nor can we assist in setting up, troubleshooting or diagnosing any issues which may arise. If you should require additional assistance in regards to automated backups, please contact your Abila Business Partner.
If you do not have an assigned Abila Business Partner, you can contact Abila Sales (800-647-3863) for information on business partners in your area.
To utilize MS SQL and Windows Task Scheduler for automated backups, a simple batch file is created that which will initiate a SQL backup by using a Scheduled Task in Windows Task Manager.
The steps below would be applicable to SQL Server 2008/2012 and Windows 7 Professional or Windows Server 2008. They may be adaptable for other operating systems but have only been tested in the environments indicated above.
Creating the Batch File:
Click Here to download a zipped file that will be used for this process. The zip file should be downloaded to the server for FR50 and the files extracted to the directory where MS SQL is installed. The zip file contains two files: autobackup.bat and backup.sql.
Navigate to the MS SQL Server folder and right click on 'autobackup.bat', select Edit. The file contents will be as illustrated:
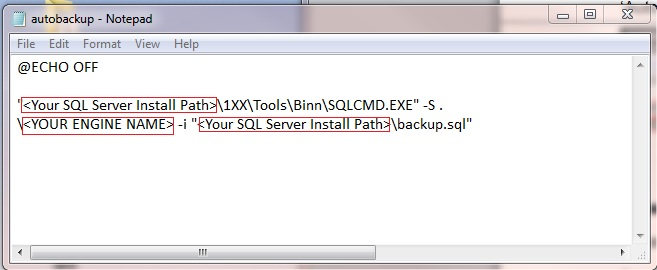
Areas outlined in red must be modified to reflect your installation environment.
The folder 1XX above will need to be modified as well:
-
100 for SQL Server 2008
-
110 for SQL Server 2012
For example if the default install path was used for MS SQL Server and your instance name for FR50 is Fundraising50; then the edited text would be as follows:
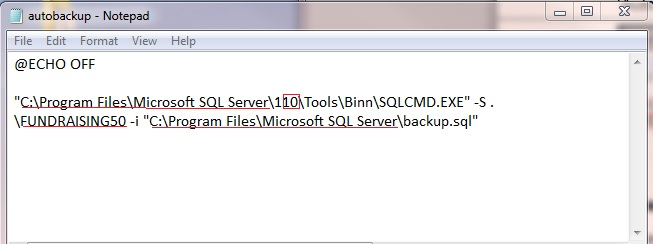
To locate "YOUR ENGINE NAME", access MS SQL Server Management Studio Express on the FR50 server. (Start>All Programs>Microsoft SQL Server>SQL Server Management Studio Express) Select "Connect" on the first screen. The 'Engine Name' is displayed next to the computer name in the Object Explorer. This would also be referred to as your instance name for SQL.

Once the modifications to 'autobackup.bat' are completed, navigate to File>Save to retain your edits. Close Notepad.
In the same folder right click on 'backup.sql' and select Open with Notepad. The unedited file will appear as below:
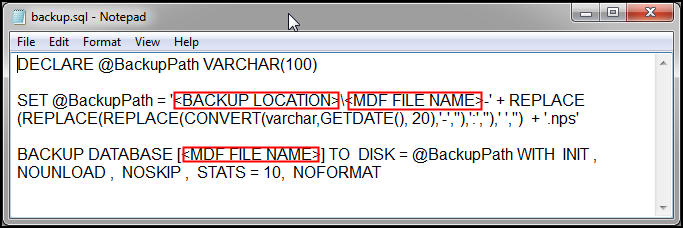
The areas in red must be modified to reflect your SQL install and environment. For example, if your database is named 'Training' and the backup location has not been changed from the default for FR50, the edited text would be:

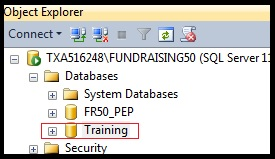
To locate your database file name or .mdf file for the database, select: Start>Programs>MS SQL Server>SQL Server Management Studio Express
Click Connect on the first screen. In the Object Explorer window find the name of your database:
When the appropriate modifications to the text file are complete, select File>Save, then Exit.
NOTE:
You may need to create a subdirectory for your database in the @ Backup Path location if it does not already exist. The first time you create a backup from within FR50, the backup utility creates a subdirectory that corresponds to the database name which is also the name of your .mdf file. If your organization has not preformed the backup procedure from within FR50, this sub-directory does not exist.
Establish A Windows Scheduled Task (W7 Pro and Server 2008):
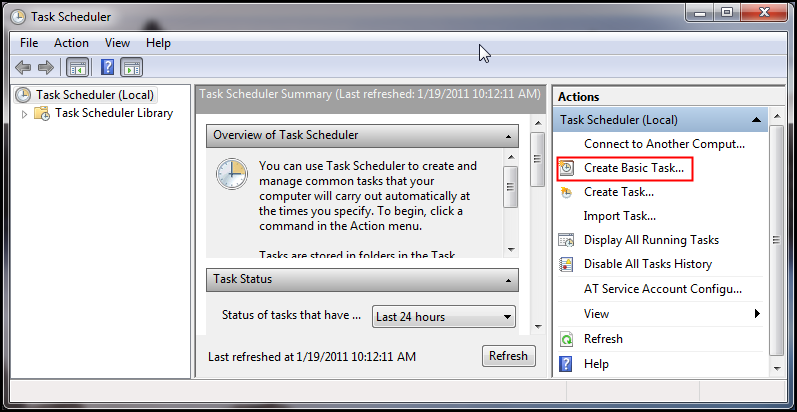
Create Scheduled Task (Start>Control Panel>Administrative Tools). Double-click on Task Scheduler and select Basic Task.
In the "Create a Basic Task" section, give the take a name and if desired, a brief description. Click Next

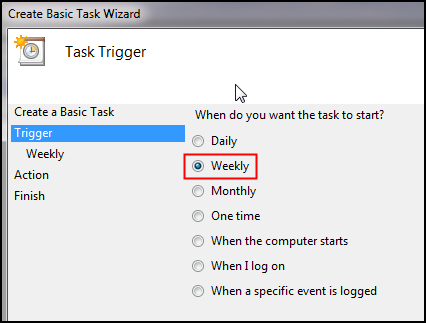
In the "Trigger" section, select the interval at which you would like the task to run. Click Next.
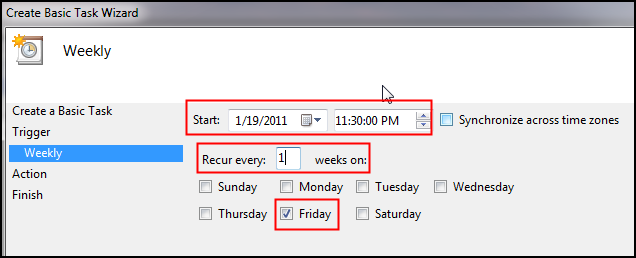
On the next screen select your start date, scheduled backup time and day. Click Next.
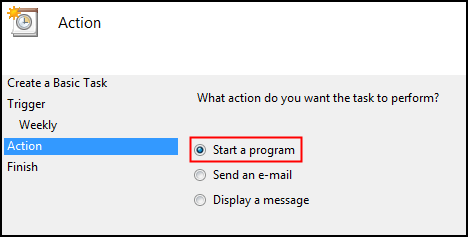
Under Action select "Start a Program". Click Next.
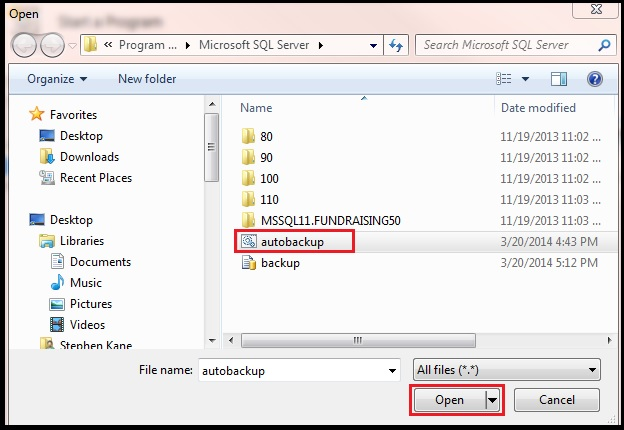
On the Start a Program screen, select Browse. Navigate to the location where the edited autobackup.bat file is located, select the file and choose Open. Click Next.

Check the box next to "Open the Properties dialog for this task when I click Finish". Select Finish

The Scheduled Task Properties now appear. Areas in red are required:

OPTIONAL:
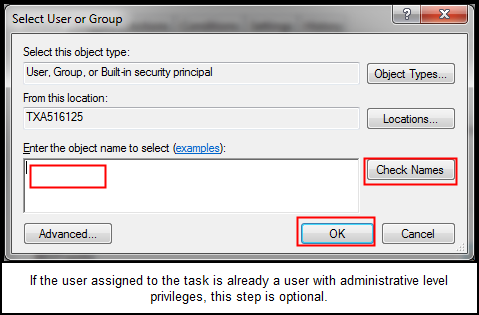
To change the network administrator level user account that is assigned to this task, you can select Change User or Group and add the User. Select Check Names to validate the user account. Click OK.
Additional Information
This procedure will only back up a single database. If your organization has multiple databases, you will need to create a backup routine for each database
Each backup task will create a unique backup file. To better manage disk space, it is strongly recommended to access the backup directory periodically and archive or delete older backup files.
Article Type
Product Info
Product Line
Fundraising 50
Product Module/Feature
Backup
Ranking