
Answer
The process for saving a file is identical to an on-premise system with the exception that you should ensure you navigate to a location outside of the hosted server. The default folder Save/Save as location for any file is set in your User Options.
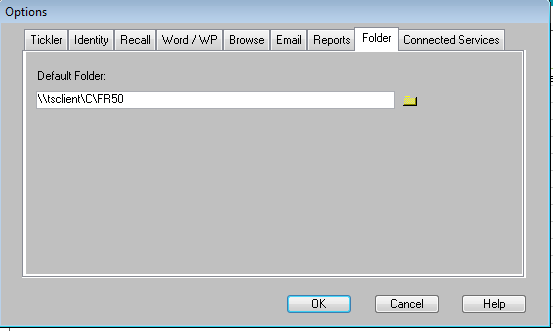
From the main toolbar select User>Options> Folder. In our example the Default Folder path is: ‘\\TSClient\C\directory or folder of your choice’ - which is a folder or directory located on the root of the C drive on the local computer (i.e. your computer).
Each organization/user establishes a default Folder of their choosing. The location that a file is saved in can be altered during the Save/Save As process, but will initially display the default value entered here. In our example we created a folder titled FR50 that will be the default location for files. Again, this location can be changed during the actual Save/Save As process.
MAC USERS: Your default directory path will be formatted as below:
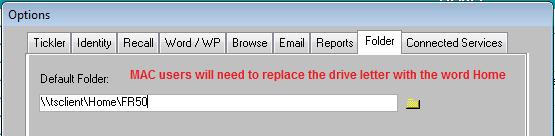

Please note that if you change your default value, the path format does not include the standard colon ( : ) after the drive letter.
If the path is altered, either as a new default or during the Save/Save As process, special care should be taken so as not to inadvertently save a file to the hosted server. Whenever the default path is not desired follow the steps outlined below.
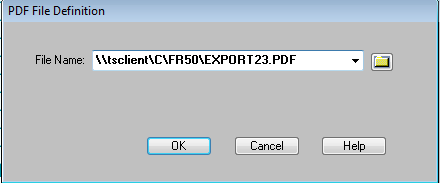
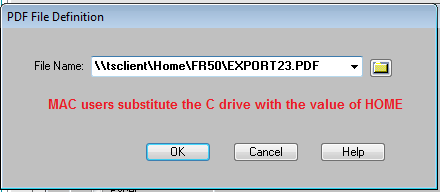
Please note the screen shots provided are based on saving a PDF file but would also apply when selecting the Export or Excel options as well as when saving a merged document. The main purpose of this article is to help you ensure you are navigating to a location outside of the hosted server itself.
-
Click the ‘Folder’ icon to the right of the ‘File Name’ field.
-
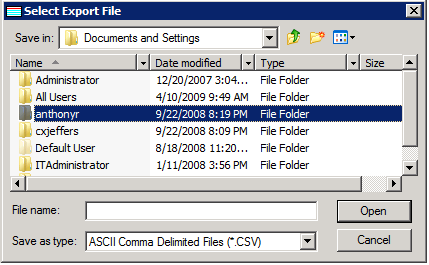
The ‘Select Export File’ window will appear listing the directory structure on the root of the C drive of your computer (based on the Default Folder listed in our User option, your initial Save in: location may vary).

-
From this point, you can browse through to the ‘My Documents’ folder in your local profile via the Documents/Settings
-
Double-click your profile name and then select the My Documents directory from within your profile:
-
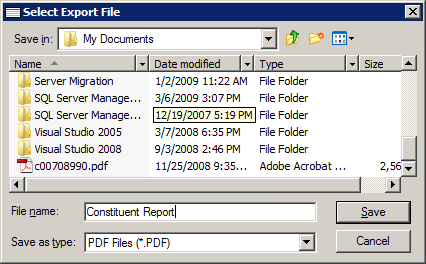
Once the desired location has been reached, enter a name and appropriate Save as type and click the ‘Save’ button. In this example, the name ‘Constituent Report’ was used. The File Name will populate with the selected path/file name.
-
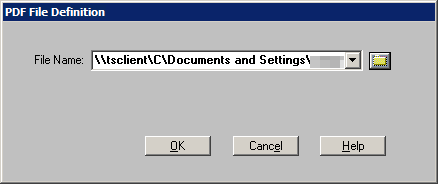
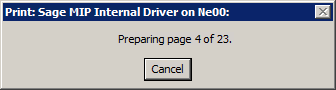
Click the ‘OK’ button to return to the ‘Run Report’ window followed by clicking ‘OK’ to run the report. You will receive a status window displaying the number of pages. This process may take some time depending on the number of records/pages contained in the report.
-
When the process has completed, the file can be viewed from the location indicated in Step 4.
Article Type
Product Info
Product Line
Fundraising 50
Product Module/Feature
Export Transactions
Ranking